The Playbooks Screen
- 20 May 2023
- 8 Minutes to read
-
Print
-
DarkLight
The Playbooks Screen
- Updated on 20 May 2023
- 8 Minutes to read
-
Print
-
DarkLight
Article Summary
Share feedback
Thanks for sharing your feedback!
Overview
The Playbooks feature allows ThreatConnect® users to automate cyberdefense tasks via a drag-and-drop interface. The interface uses Triggers (tools that create an event that initiates the actions defined within a Playbook, such as creating a new IP address Indicator or sending a phishing email to an inbox) to pass data to Apps, which perform a variety of functions, including data enrichment, malware analysis, and blocking actions.
The Playbooks screen lists all Playbooks, including Playbook Components, available in your Organization. From this screen, you can perform a variety of actions, including creating new Playbooks, searching for and opening Playbooks, importing and exporting Playbooks, cloning Playbooks, and deleting Playbooks.
Before You Start
| Minimum Role(s) |
|
|---|---|
| Prerequisites | Playbooks enabled by a System Administrator |
The Playbooks Screen
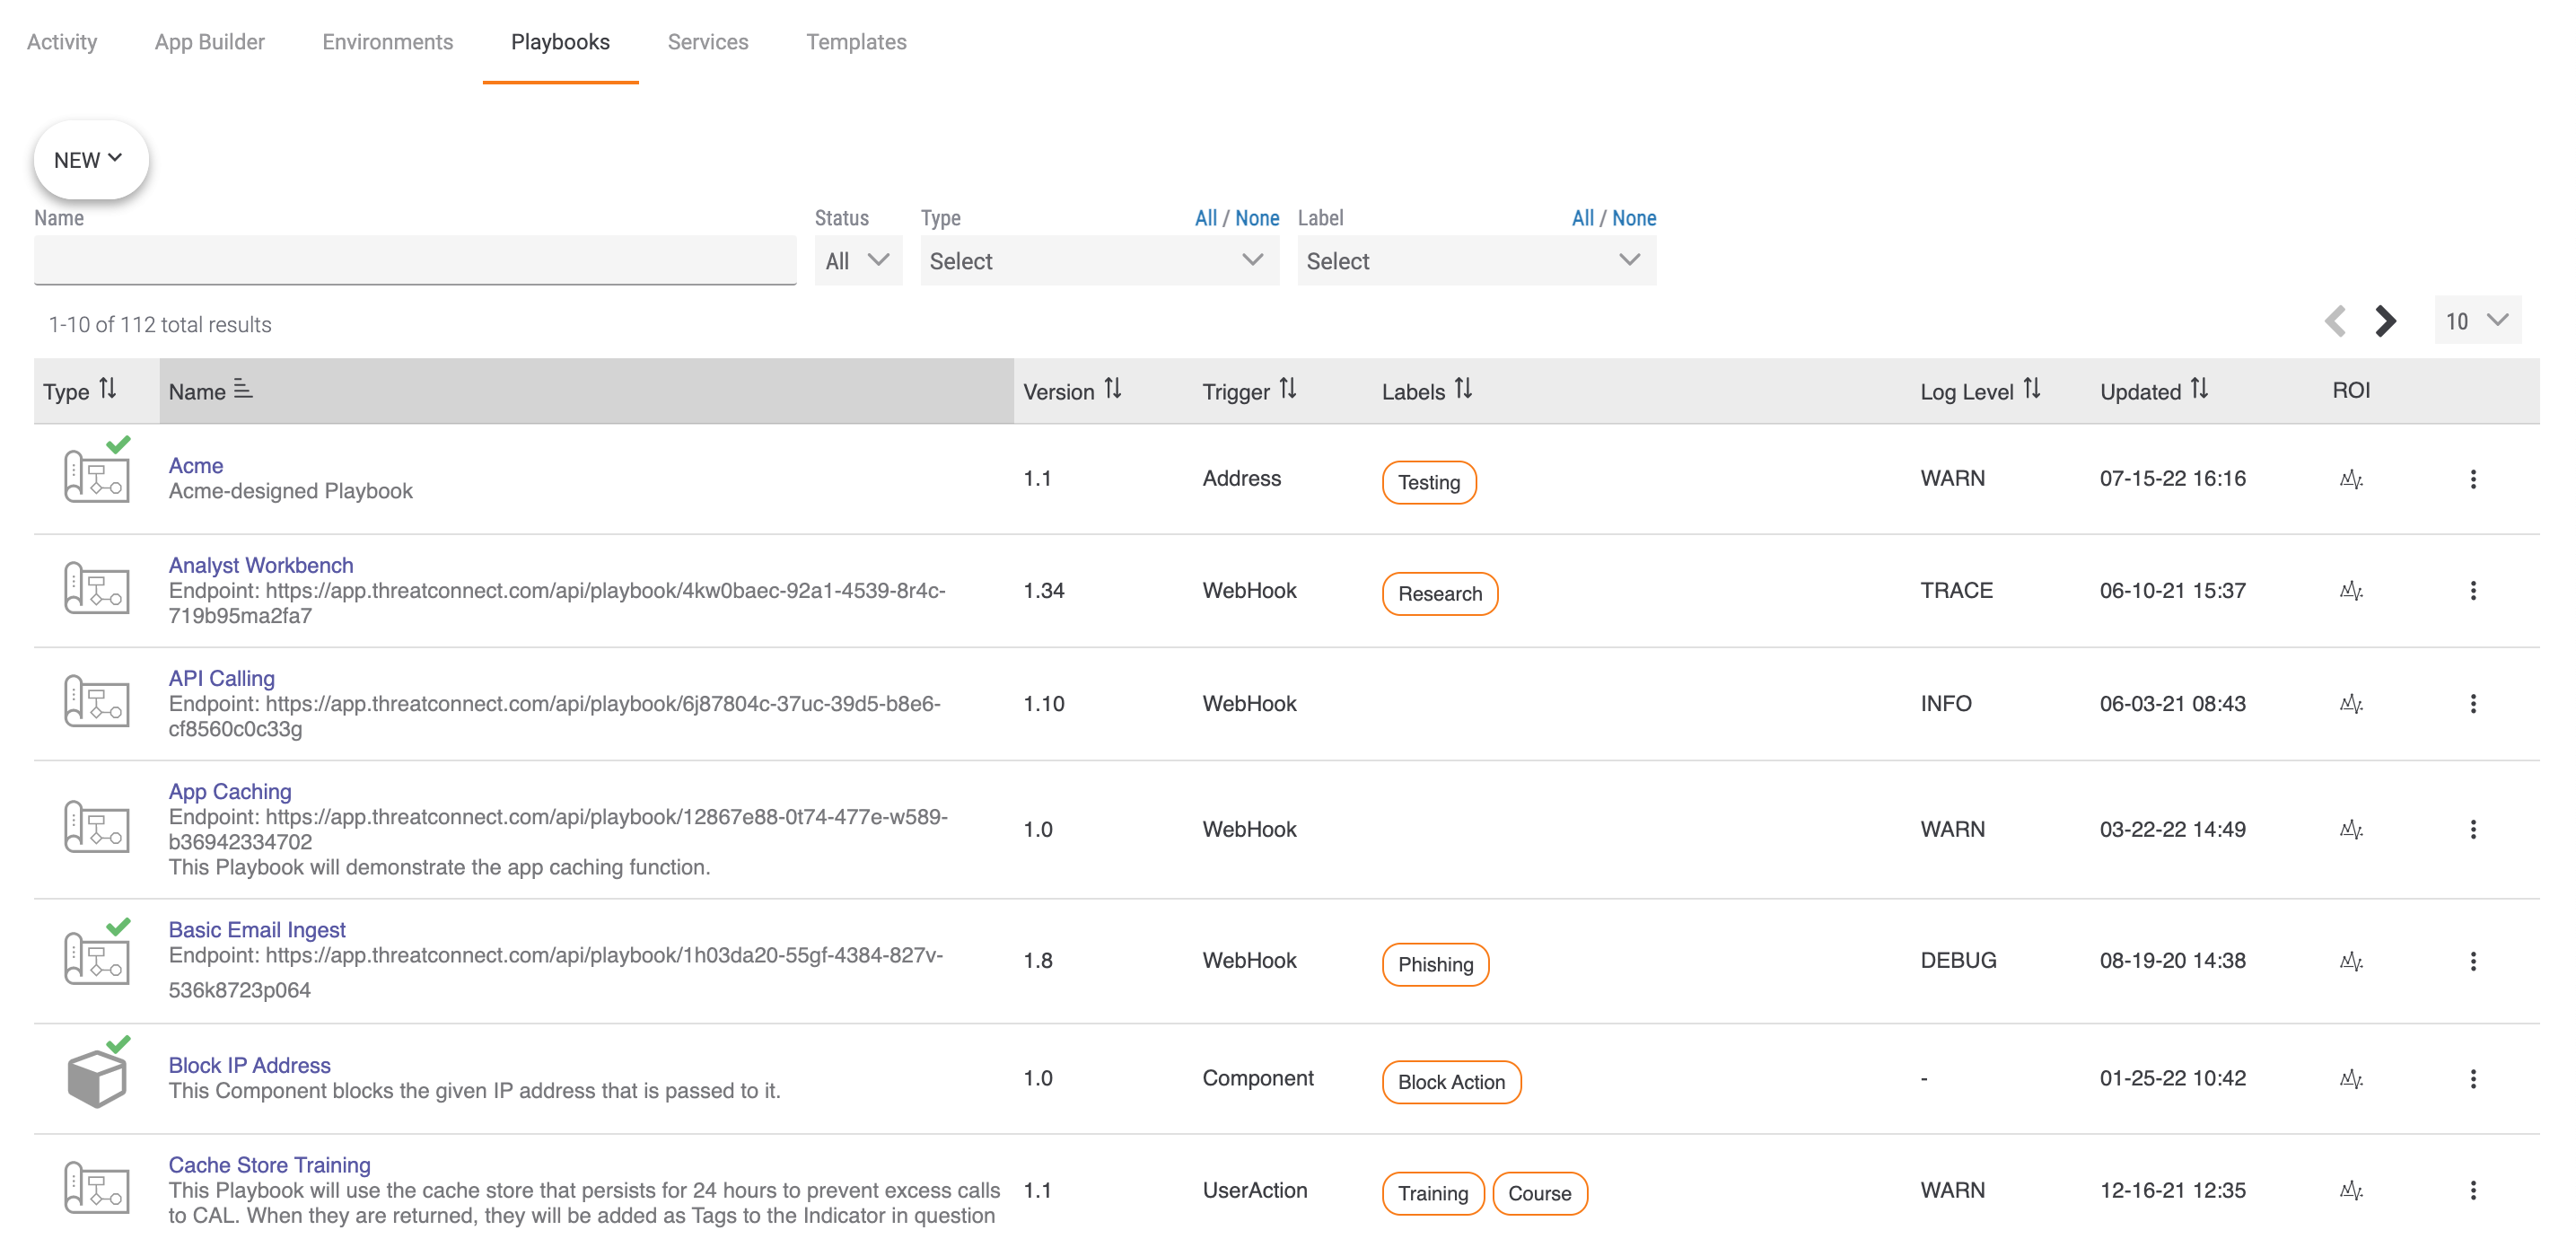
On the top navigation bar, click Playbooks to display the Playbooks screen, which shows all available Playbooks and Components in your Organization (Figure 1).
Note
If no Playbooks have been created in your Organization, or if there are pre-existing filter settings that do not match any Playbooks in your Organization, the Playbooks screen will display a message stating that no Playbooks were found.
This screen displays up to six tabs at the top left: Activity, App Builder, Environments, Playbooks, Services, and Templates. This article covers the Playbooks tab.
Note
The Activity and Environments tabs will be available only to users with an Organization role of Organization Administrator. The Apps tab will be available only to users with an Organization role of Organization Administrator or App Builder. The Services tab will be available only to users with an Organization role of Organization Administrator and whose Organization has System-level permissions enabled for the app build functionality.
The Playbooks Table
The Playbooks screen is organized into a table with nine columns:
- Type: This column displays icons that illustrate the type of item in each row.
 indicates that the item is a Playbook.
 indicates that the item is a Playbook Component.
 indicates that the item is a Workflow Playbook.
- A green checkmark above the Playbook or Component icon (as shown for the Acme and Basic Email Ingest Playbooks and the Block IP Address Component in Figure 1) indicates that the Playbook or Component is active and available for execution.
- Name: This column displays the name of the Playbook or Component. Click on the name to open the Playbook or Component. If there is a WebHook or Mailbox Trigger in the Playbook, the Trigger URL (WebHook) or Target Mailbox (Mailbox) of the Trigger will be displayed under the Playbook name. Components do not have Trigger URLs or Target Mailboxes associated with them. If a creator or editor has provided a description of the Playbook or Component, the description will be displayed below the endpoint (or directly below the name if no endpoint is available).NoteIf you hover over any part of a row containing an active Playbook with a URL endpoint, two icons will be displayed to the right of the endpoint. Click the Copy Endpoint
 icon to copy the URL endpoint to the clipboard. Click the Execute Endpoint
 icon to execute the Playbook’s endpoint. These icons are not displayed for Components.
 - Version: This column displays the version number of the Playbook or Component.
- Trigger: This column displays the type of Trigger that initiates execution of the Playbook. If the item is a Component, then “Component” will be displayed in this column. If the Playbook does not have a Trigger (e.g., if it is not yet fully designed and configured), then this column will be blank.
- Labels: This column displays the labels that have been applied to the Playbook or Component. Labels are keywords that are used to classify Playbooks and Components. For example, labels such as “In Design” and “QA” can be used to track the development or status of Playbooks, and labels such as “Enrichment” and “Reporting” can be used to make filtering by Playbook type more manageable.
- Log Level: This column displays the log level for the Playbook. Components do not have log levels.
- Updated: This column displays the date and time at which the Playbook or Component was last updated.
- ROI: Click the graph
 icon in the ROI column to display a window containing return on investment (ROI) metrics for the Playbook. Components do not have ROI metrics.
 - Administrative Options Menu: Click the vertical ellipsis
 for an item to display a menu with the following administrative options: Clone, Delete, Export, and Import New Version.
Searching and Filtering Playbooks
Playbooks and Components can be searched and filtered by using the menus above the table:
- Name: Use this field to search for Playbooks and Components by name.
- Status: Use this dropdown to filter Playbooks and Components by status (Active or Inactive).
- Type: Use this dropdown to display a scrollable multi-select list of Trigger types. Select one or more Trigger types to display only Playbooks with those types of Triggers. Select the Component option to display only Playbook Components. Use the All / None links above the dropdown to select or deselect all Trigger types, respectively.
- Label: Use this dropdown to display a scrollable multi-select list of available labels. Select one or more labels to display only Playbooks and Components with those labels. Use the All / None links above the dropdown to select or deselect all labels, respectively.
Note
The searches and filters you apply to the table on the Playbooks screen will persist, even if you navigate to another screen in ThreatConnect or log out of ThreatConnect.
Creating a New Playbook
- Hover over the NEW button at the upper-left corner of the Playbooks screen and select Create Playbook. The Create Playbook window will be displayed (Figure 2).
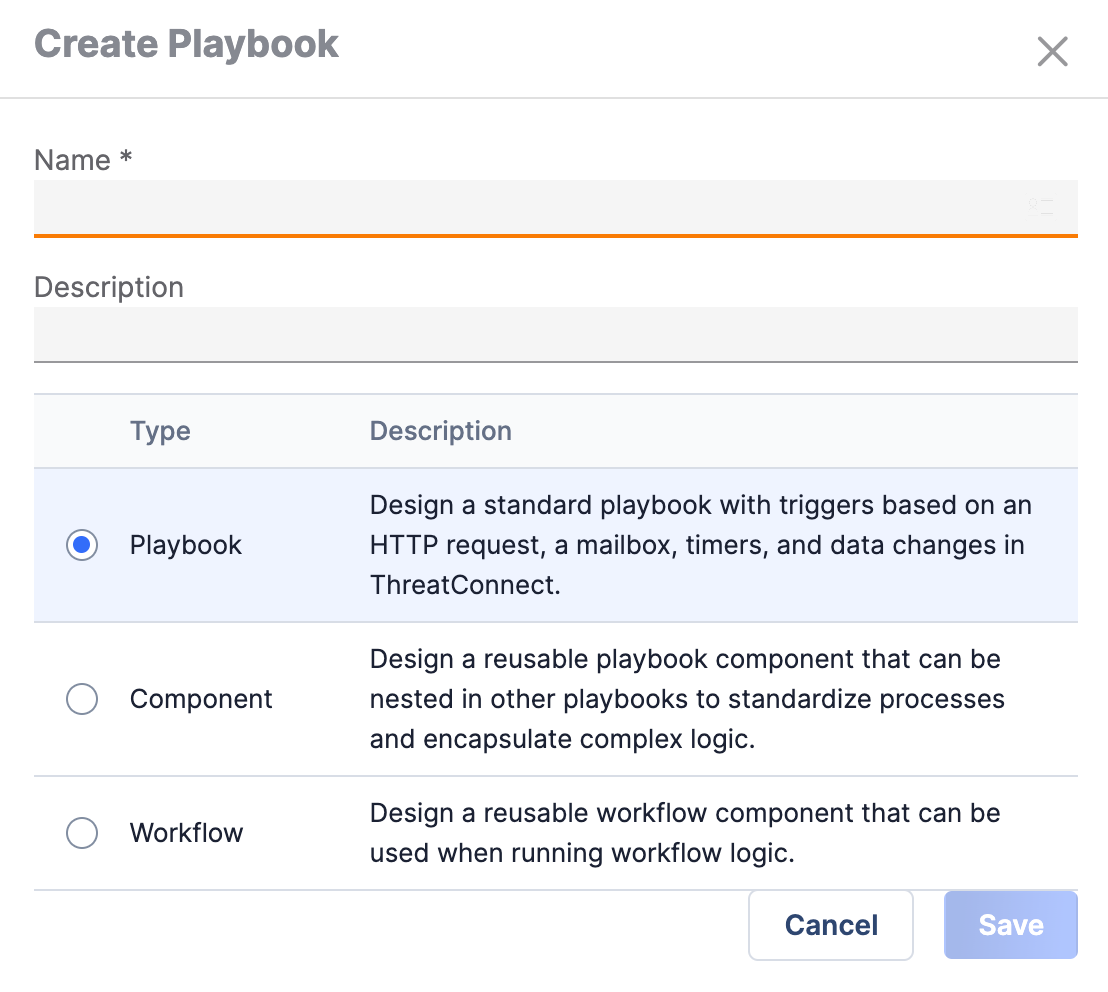
- Name: Enter a name for the Playbook.
- Description: Enter a description for the Playbook.
- Leave the Playbook option selected.
- Click the SAVE button.
- The new Playbook will open in the Playbook Designer.
For more information about creating Playbook Components and Workflow Playbooks, see Creating a Component and Creating a Workflow Playbook, respectively.
Importing a Playbook
You can import a Playbook by uploading a Playbook file (.pbxz or .pbx) that has been saved on your local drive.
- Hover over the NEW button at the upper-left corner of the Playbooks screen and select Import Playbook.
- Use the file browser to select a .pbxz or .pbx file to upload. If importing a .pbxz file, the Import Playbook drawer will be displayed (Figure 3). If importing a .pbx file, the Playbook will open in the Playbook Designer .
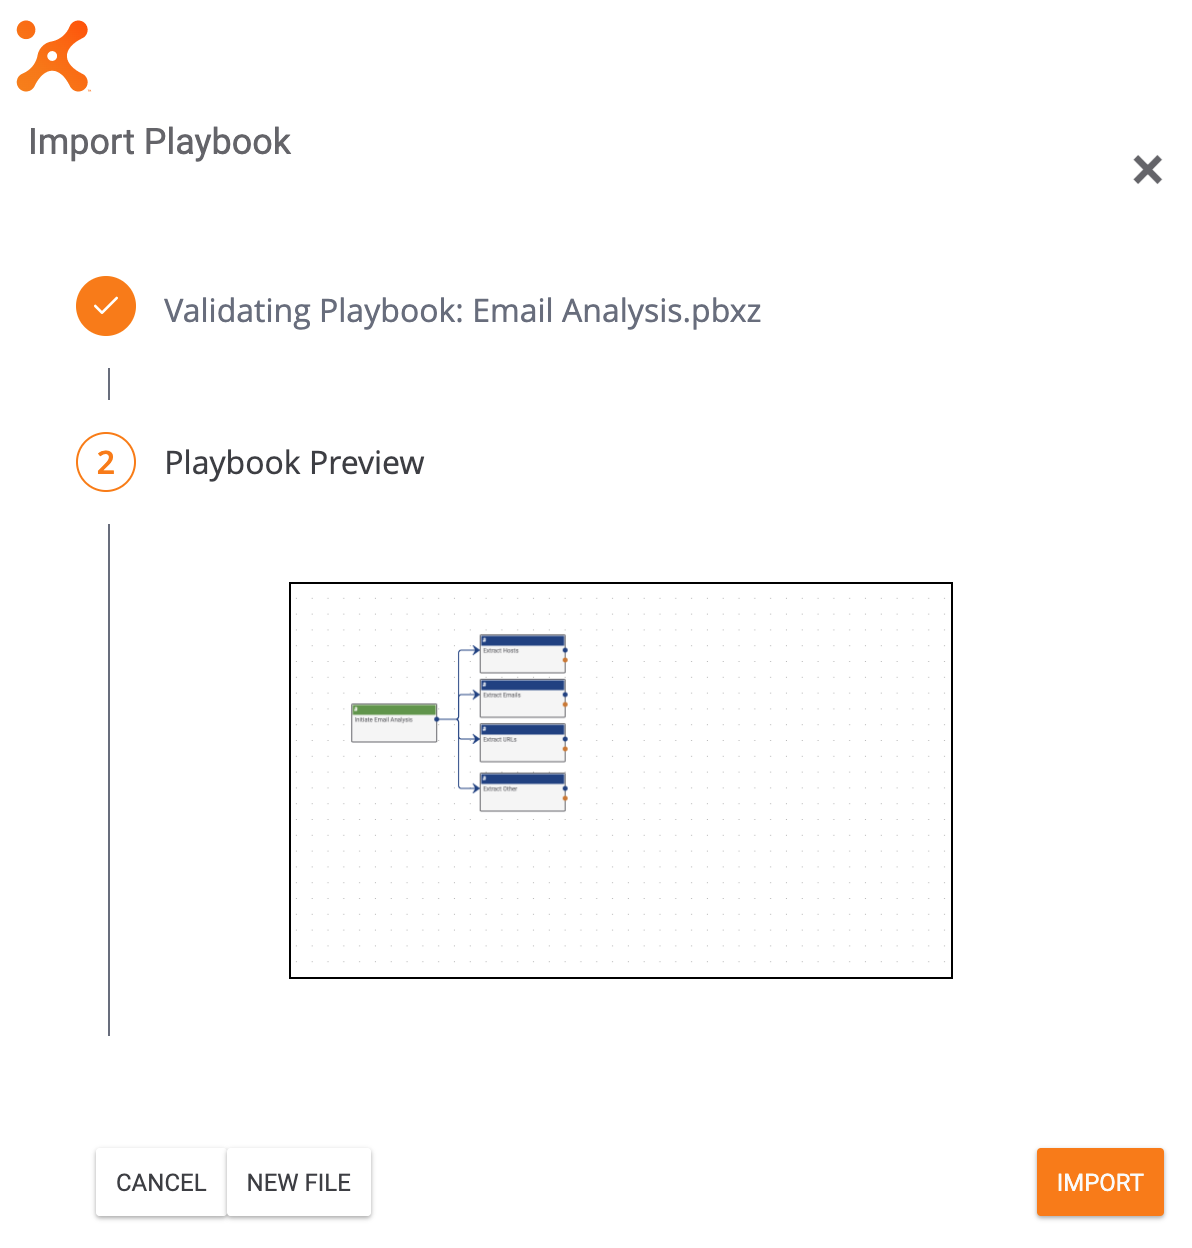 NoteWhen importing a Playbook with Service Triggers, you will be prompted to install any Apps that do not exist in your Organization and to associate Triggers being imported with available Trigger Services.
- A preview image of the Playbook will be displayed in the Playbook Preview section. Click the image to expand it, if desired.
- To select a different file to upload, click the NEW FILE button.
- Click the IMPORT button to import the file as a new Playbook in the Playbook Designer.
Important
If a Playbook you are importing contains Components, all Components that do not already exist in your instance will also be imported. If a Component with the same name as a Component in the import file already exists, the Component in the import file will not be imported, and the existing Component will be called by the Playbook when the Playbook is run.
Important
Imported Playbooks and Components will never override existing Playbooks or Components of the same name. If a Playbook you are importing has the same name as a Playbook that already exists on your instance, a “1” will be added to the end of the imported Playbook’s name. The same principle applies to Components that are imported on their own (i.e., not as part of a Playbook).
Note
If a Playbook you are importing includes an App that was configured to use a particular Environment when the Playbook was exported and that Environment exists in your Organization, then that Environment will be automatically selected in the App’s configuration upon import of the Playbook.
Importing a Shared Playbook
You can import a shared Playbook via its Share Token.
- Hover over the NEW button at the upper-left corner of the Playbooks screen and select Import Shared Playbook. The Import Playbook drawer will be displayed (Figure 4).
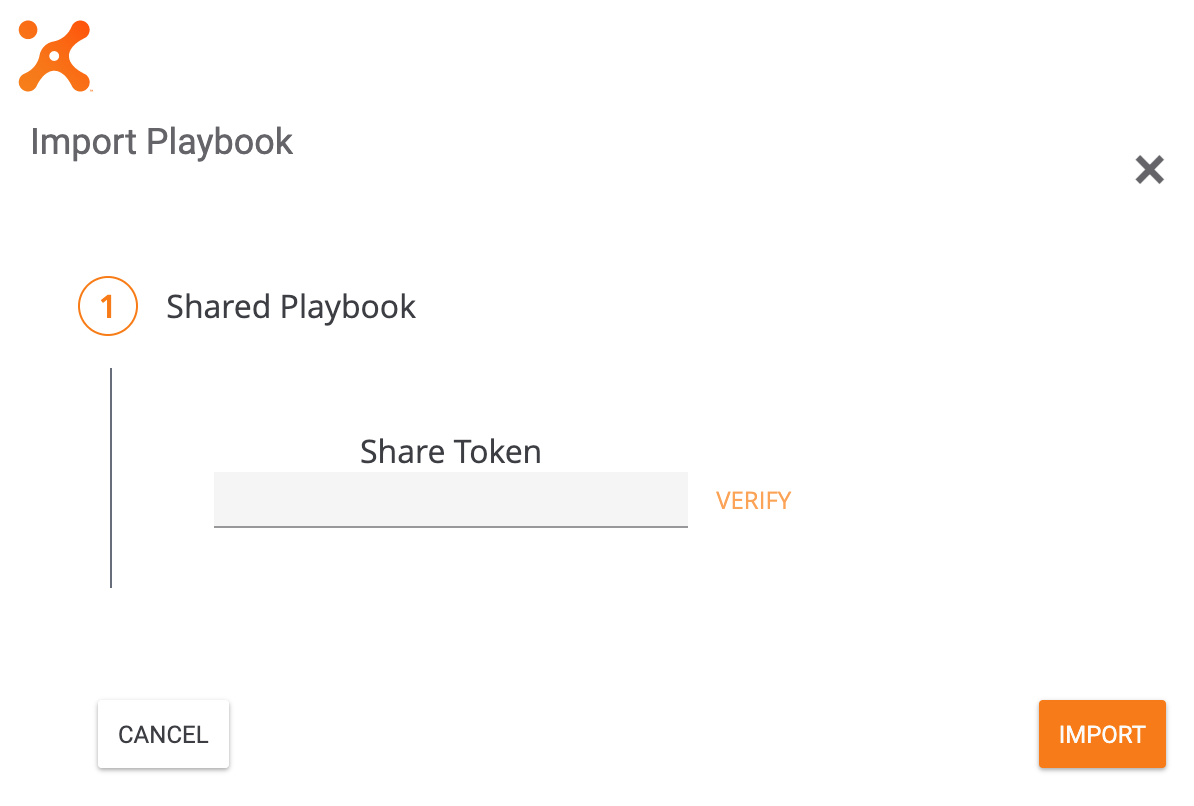
- Enter the shared Playbook’s Share Token in the Share Token box, and then click VERIFY. If the Share Token is valid, the Playbook Preview will be displayed (Figure 5). If the Share Token is not valid, a message will be displayed stating that ThreatConnect is unable to import the Playbook and asking you to confirm whether the token is valid.
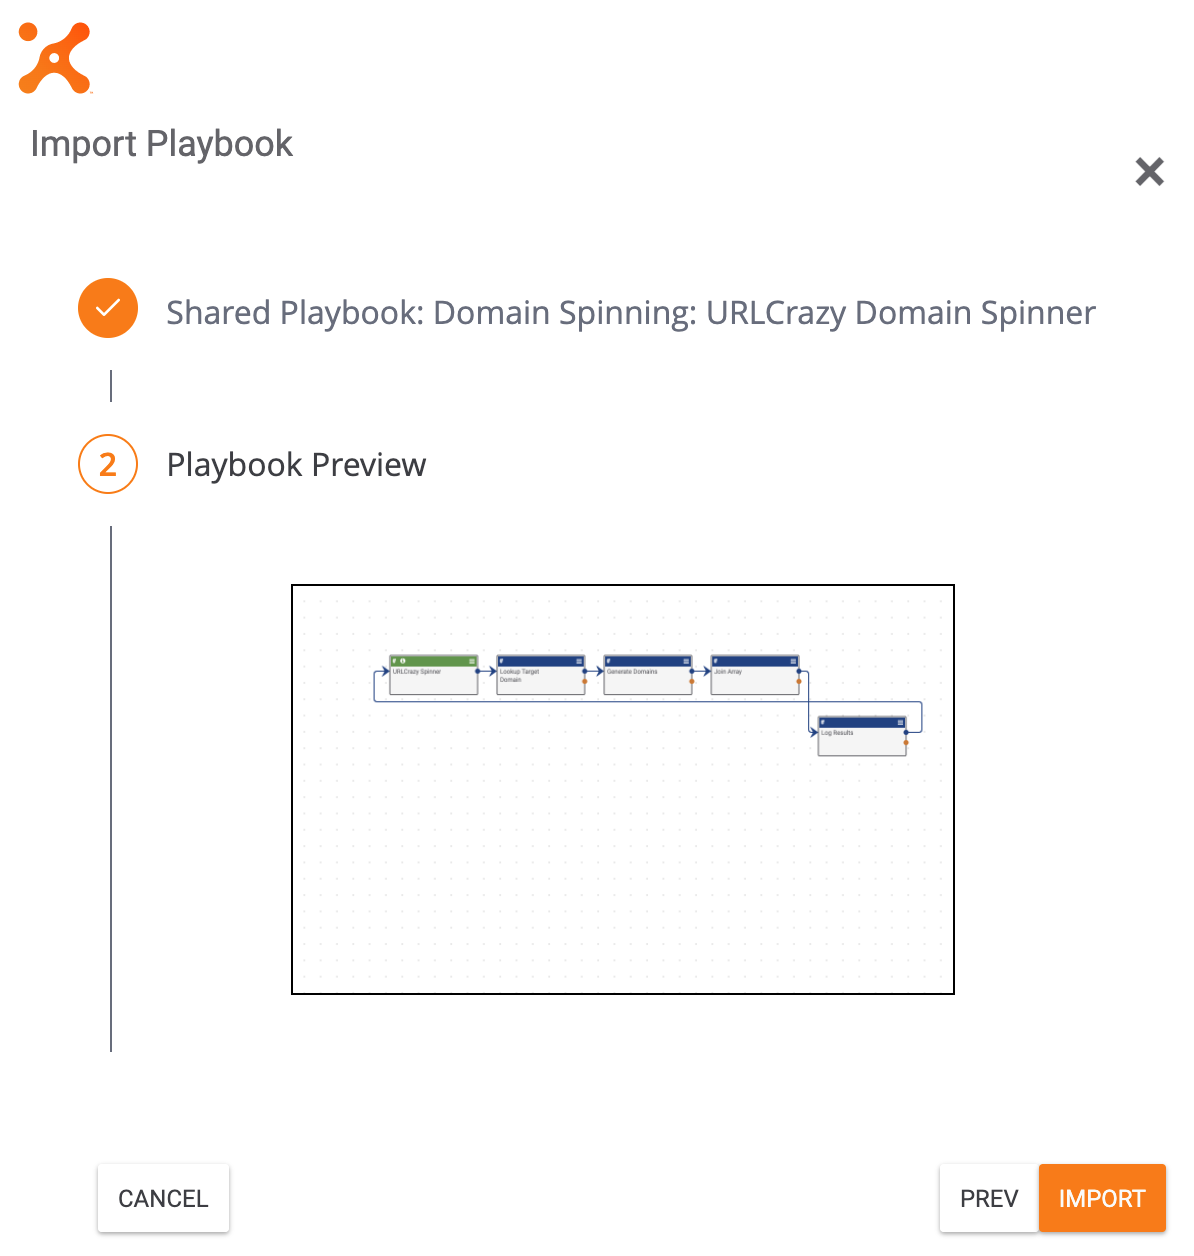
- Click the IMPORT button to import the file as a new Playbook in the Playbook Designer.
Playbook Administrative Options
On the Playbooks screen (Figure 1), click the vertical ellipsisto the right of each row of the table to display a menu with the following administrative options for the corresponding Playbook: Clone, Delete, Export, Import New Version.
Clone
- Select the Clone option to clone a Playbook or Component. The Clone Playbook window will be displayed (Figure 6).
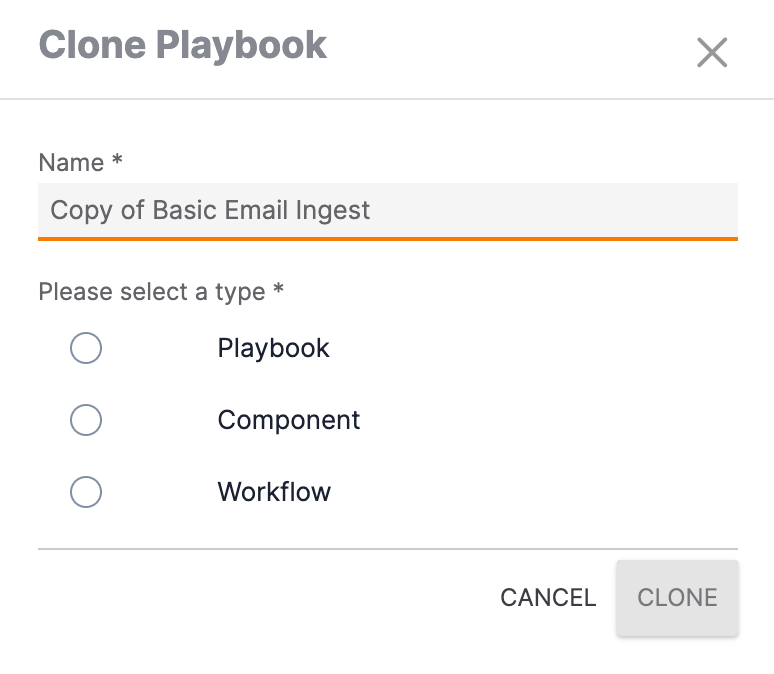
- By default, the name of the new Playbook will be Copy of <original Playbook name>. To edit the name of the Playbook, click in the Name box.ImportantWhen a Playbook is cloned, it is always named Copy of <original Playbook name> by default. If a Playbook has previously been cloned and its name was not edited (i.e., its name was saved as Copy of <original Playbook name>), the name for any subsequent copies of the Playbook will need to be manually edited.
- Select the type of object that the Playbook should be cloned as (Playbook, Component, or Workflow Playbook), and then click the CLONE button. The cloned object will open in the Playbook Designer.
Delete
Select the Delete option to delete a Playbook or Component. The Delete Playbook? window will be displayed. Click the DELETE button to delete the Playbook.
Important
Deleting a Playbook will delete all ROI metrics related to that Playbook.
Export
- Select the Export option to export a Playbook or Component. If there are no encrypted parameters in the Playbook, it will automatically download to your local drive. If there are encrypted variables, the Export Playbook drawer will be displayed (Figure 7).
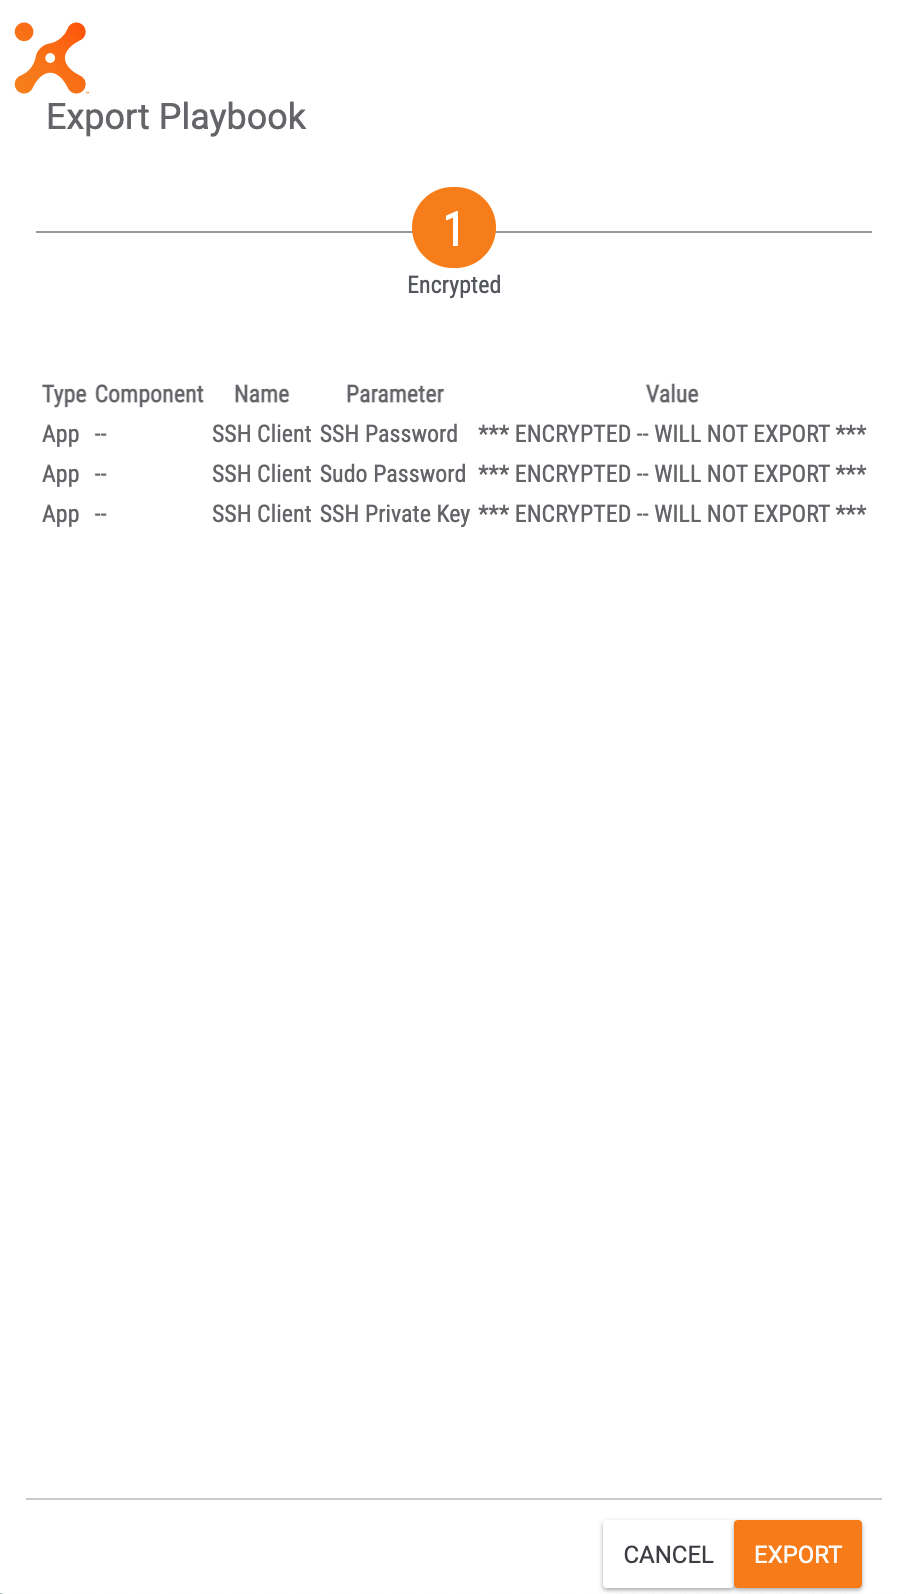
- Review the displayed encrypted parameters, and then click the EXPORT button to download the Playbook to your local drive.
Note
When exporting a Playbook, all Components called in the Playbook will be exported as well. The Playbook and all of the Components will be downloaded in a single .pbxz file.
Import New Version
- Select the Import New Version option to import a Playbook or Component from your local drive as a new version of an existing Playbook or Component, respectively.
- Use the file browser to select a .pbxz or .pbx file. If importing a .pbxz file, the Import Playbook Version drawer will be displayed (Figure 8). If importing a .pbx file, the new version of the Playbook will open in the Playbook Designer.
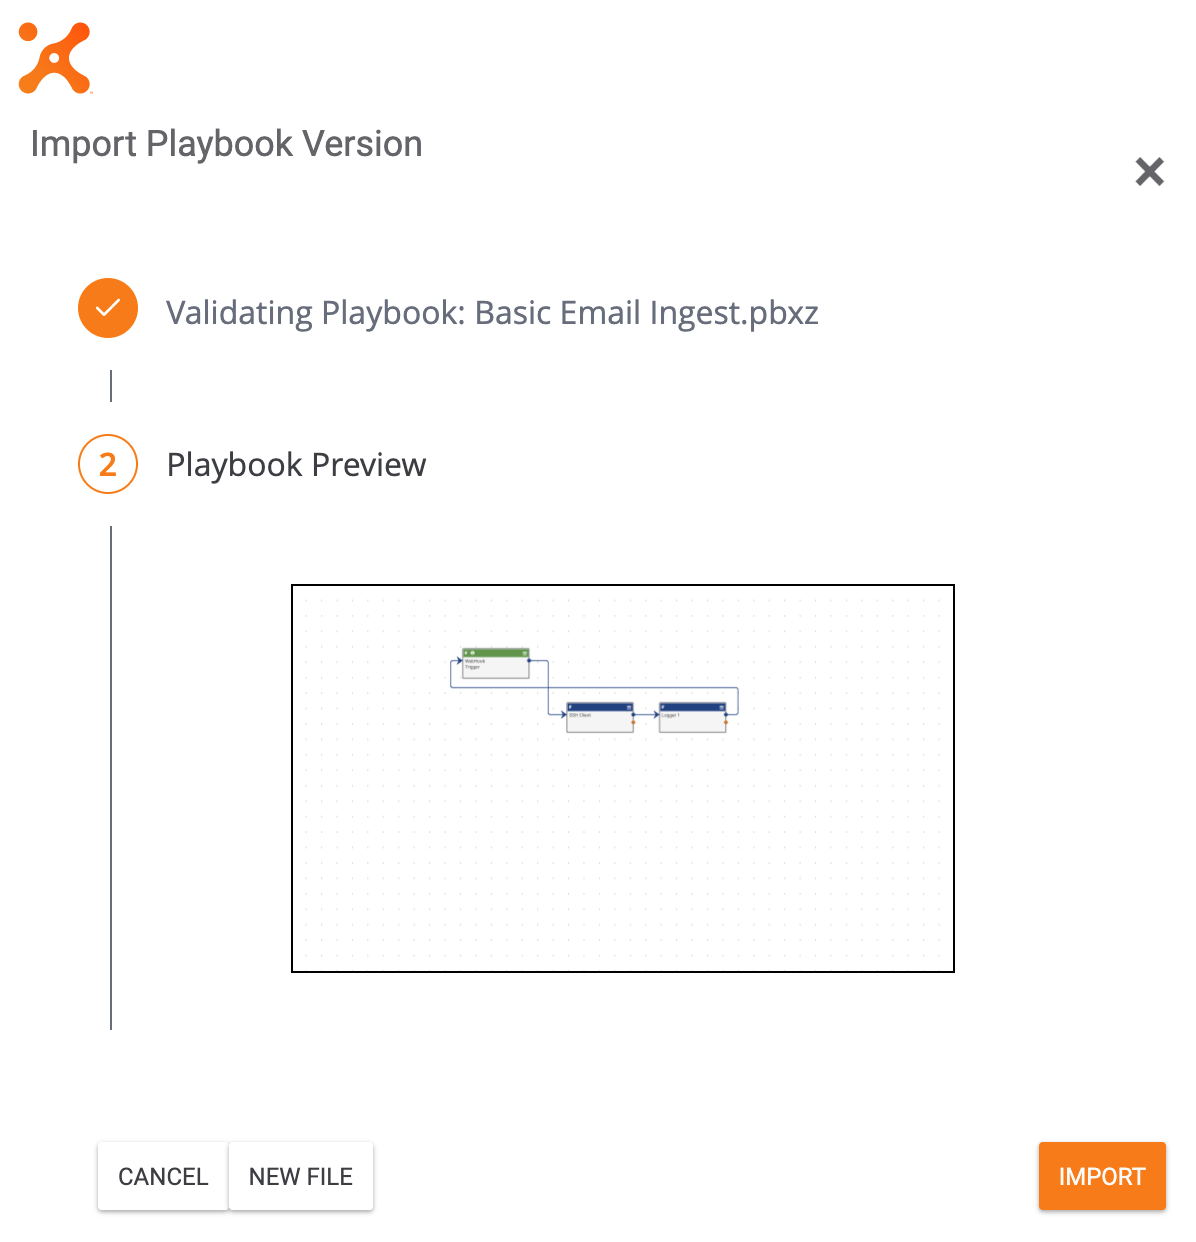
- A preview image of the Playbook will be displayed in the Playbook Preview section. Click the image to expand it, if desired.
- To select a different file to upload, click the NEW FILE button.
- Click the IMPORT button to import the file as a new version of the Playbook in the d.
ThreatConnect® is a registered trademark of ThreatConnect, Inc.
20112-01 v.02.C
Was this article helpful?
